

Integrate One Tap Sign In on your website - React JS
Introduction
One Tap Sign In is a phone verification plugin that works on the frontend, similar to Gmail - One Tap Sign in. It simplifies global phone number verification by using OTP/pass code. Sign in with Phone eliminates the need for complex telecom registration and SMS API Gateway integration for each country.
Click here to try One Tap Sign in With Phone demo .
To seamlessly integrate the plugin into your website, follow the instructions provided below.
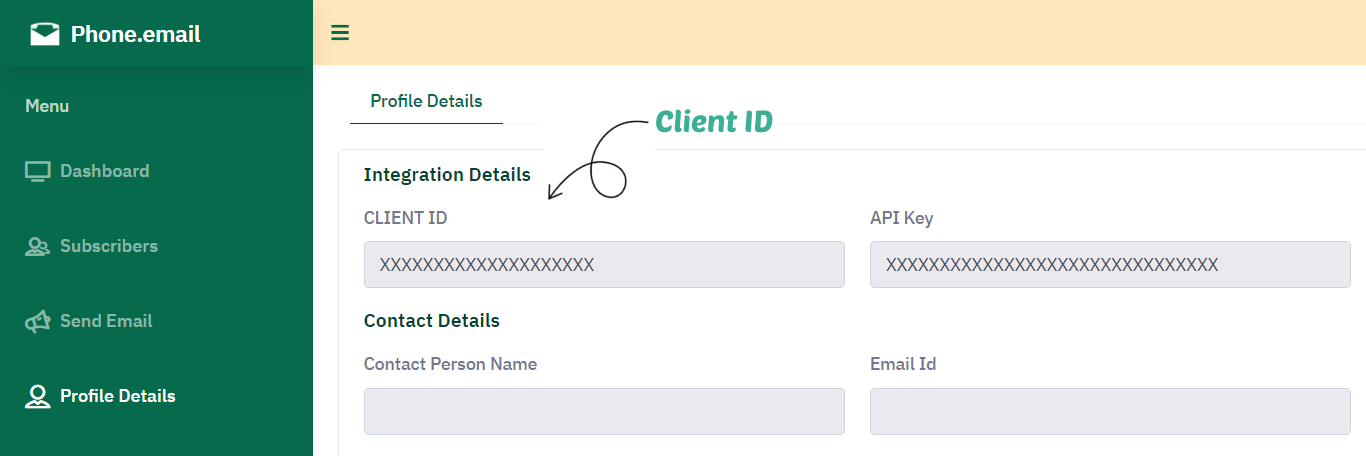
1. Admin Dashboard
To integrate One Tap Sign In button on your website, get the CLIENT_ID from the Profile Details section by signing into the Admin Dashboard. You will need to update the Client ID in the code snippet as instructed in step 2.
Admin Dashboard link: https://admin.phone.email
2. Integrate One Tap Sign In button
To integrate One Tap Sign In button on your website page, you'll need to install the 'phone-email-auth' package using following command.
npm i phone-email-auth Please integrate following code snippet at bottom of the primmary component so that Sign in with Phone button appears on all the pages of your website. This will enhanance number of users login/register on your website compared to a dedicated login/register page.
Note - To configure the plugin, you must modify the following parameters in the code snippet above :
- clientId: Set client id which you obtained from Profile Details section of Admin Dashboard as explained in Step 1.
- buttonText: Set button text as per your requirement.
- redirectUrl: Do not change this variable, it will be updated in next step.
import PhoneEmailLogin from 'phone-email-auth';
function App() {
	return (
		<>
        <PhoneEmailLogin clientId = "TYPE_YOUR_CLIENT_ID" position="left" buttonText="Sign in With Phone" redirectUrl="" />
		</>
	);
}

export default App;
3. Get verified phone number
Create a success page (Example: https://your-domain-name/loginsuccess) on your website where user will be redirected after successful phone verification and also set this URL in redirectUrl variable used in Step 2.
Please use the code snippet given below to get the verified phone number.
Note
- CLIENT_ID: Set client id which you obtained from Profile Details section of Admin Dashboard as explained in Step 1.
import { userInfo } from 'phone-email-auth';
import { useEffect, useState } from 'react';

function Loginsuccess() {
    const [state,setState] = useState({});
	useEffect(() => {
		const httpRequest = async () => {
		const response = await userInfo("TYPE_YOUR_CLIENT_ID");
		console.log(response)
		// From response you can get verified phone number here using keys country_code and phone_no in response
		// Register User: If user corrosponding to this verified phone number does not exist in your user table then add the user in your user table here and continue to the next step. If user already exists then skip the next step.
	}
	httpRequest()
	}, [])

    return (<></>);

}

export default Loginsuccess;
4. Logout
To handle logout simply remove the cookie named ph_email_jwt as per your programming language. In addition to deleting the cookie you should also destroy any session you have created during login process.
Should you encounter any technical challenges during the integration process, please don't hesitate to reach out to us for assistance.
Contact us WhatsApp Us